Showing posts with label cards. Show all posts

Sunday, 23 April 2023

Moroccan Tiles Background stamp from Darkroom Door

A simply divine background stamp from Darkroom Door's latest release - this one is called Moroccan Tiles. I used it to create this card:


As soon as I saw it, I though of a vintage tin tile roof. I embossed the image with silver embossing powder, then covered the entire background with Cracked Pistachio Distress Oxide Spray. Once dry, I spattered some water droplets over the top and let the Distress Oxide to its thing and give me lovely variations in colour:


I stamped and embossed in silver the words from the Follow your Heart Quote stamp, then fussy cut them and adhered them onto the background next to a cluster of cream flowers.

Thanks for stopping by, and don't forget to check out the rest of this awesome release at Darkroom Door.


Friday, 21 April 2023

Word Labels Stamp Set from Darkroom Door

 Now this is a useful stamp set! Word Labels are just that - labels with words on them. Simples!

The very first thing I did was stamp the whole thing onto mixed media cardstock, then cut each one out during a boring Teams meeting for work. I now have a lovely dish with words that are ready to roll when I get the crafting urge:


Here are a couple of projects I completed with some of the words from my dish:


I created an alcohol ink background on a piece of acetate, then attached that to a piece of cream card that had the World Map Background Stamp on it. I chose the word 'journey' on this card that is going to a friend who is about to embark on some travel. A little orange thread and some gold pearls to complete:


The next project is a tag using some of my stash of tea bag paper and tea-stained fabrics:


I started by stamping the new Small Vintage Label Eclectic Stamp to frame the focal point, then stamped Messy Mesh in a couple of spots.

Layers of fabric and tea bag underneath a Swiss stamp I bought from a grab bag on Etsy (love vintage postage stamps!).


I then added some Word Labels and some stitching with orange thread. This tag can be adhered to the front of a card, but I think it will adorn a vintage frame on my craft room wall.

Thanks for looking, and don't forget to visit Darkroom Door to see the rest of this wonderful release!


Thursday, 20 April 2023

Lattice Background Stamp from Darkroom Door

 Darkroom Door have an exciting new release happening, and it includes a beautiful new background stamp I used to make this card:


I stamped the Lattice background onto some sturdy multi media cardstock (torn from an art journal). I then ran a white crayon over the lattice pattern to protect it from the next layer of ink:


Some spattering of ink, and a few flowers from the Fine Flowers stamp set, and a couple of words from the Word Labels set, and card almost done.


I added some gauze dyed with spray ink and some sparkly diamantes to complete the card.

Thanks for looking! 

Saturday, 19 November 2022

Snow Globe Christmas Card

Hello again!

Here's a card I made with the new Snow Globe stamp from Darkroom Door:


The window gave me an opportunity to create a shaker card and use some of my sequin collection.  Here's a close up:

The reindeer and most of the stamps in the background inside the snow globe come from the Christmas Reindeer stamp set.

It was so easy to cut a window from this stamp, I can see myself creating a few more shaker cards in the near future. I'm not limited to Christmas themed cards - I'm thinking a terrarium or fishtank might be cute......

Thanks for stopping by!


Monday, 14 November 2022

Hello Wild Things!

Has it really been over a year since I last gave this blog some love???

For those who don't know, I returned to work full time a couple of years ago, so crafting has definitely fallen by the wayside. 

And then I ran into Rachel from Darkoom Door at a craft show (because crafting and shopping for craft supplies are two separate hobbies), who told me about her upcoming release, and well......it got me crafting again!

This is a card I made using the new Cheetah Texture Stamp:

I stamped it in black to create a background, then again in pink over the image of the vintage car to add some wild detail to the white space.

The car and words are from the Classic Cars Vol 1 set, and the hearts were made with the Arty Hearts Collage stamp and coordinating stencil. I also added some ink splats in pink to the background from the Paint Splats stamp set, and some marks using the Crossed Off Abstract stamp.


I will have some more samples using other awesome products from this release. In the meantime, check it out for yourself on the Darkroom Door website.


Tuesday, 5 October 2021

MIchelle Lupton's Case me a Christmas Card Challenge

 It was lovely to get a message from Michelle Lupton asking me to once again be part of her annual challenge.

Michelle creates a card inspired by one of mine and vice versa. I love seeing all of her invited guests in the build up to Christmas.

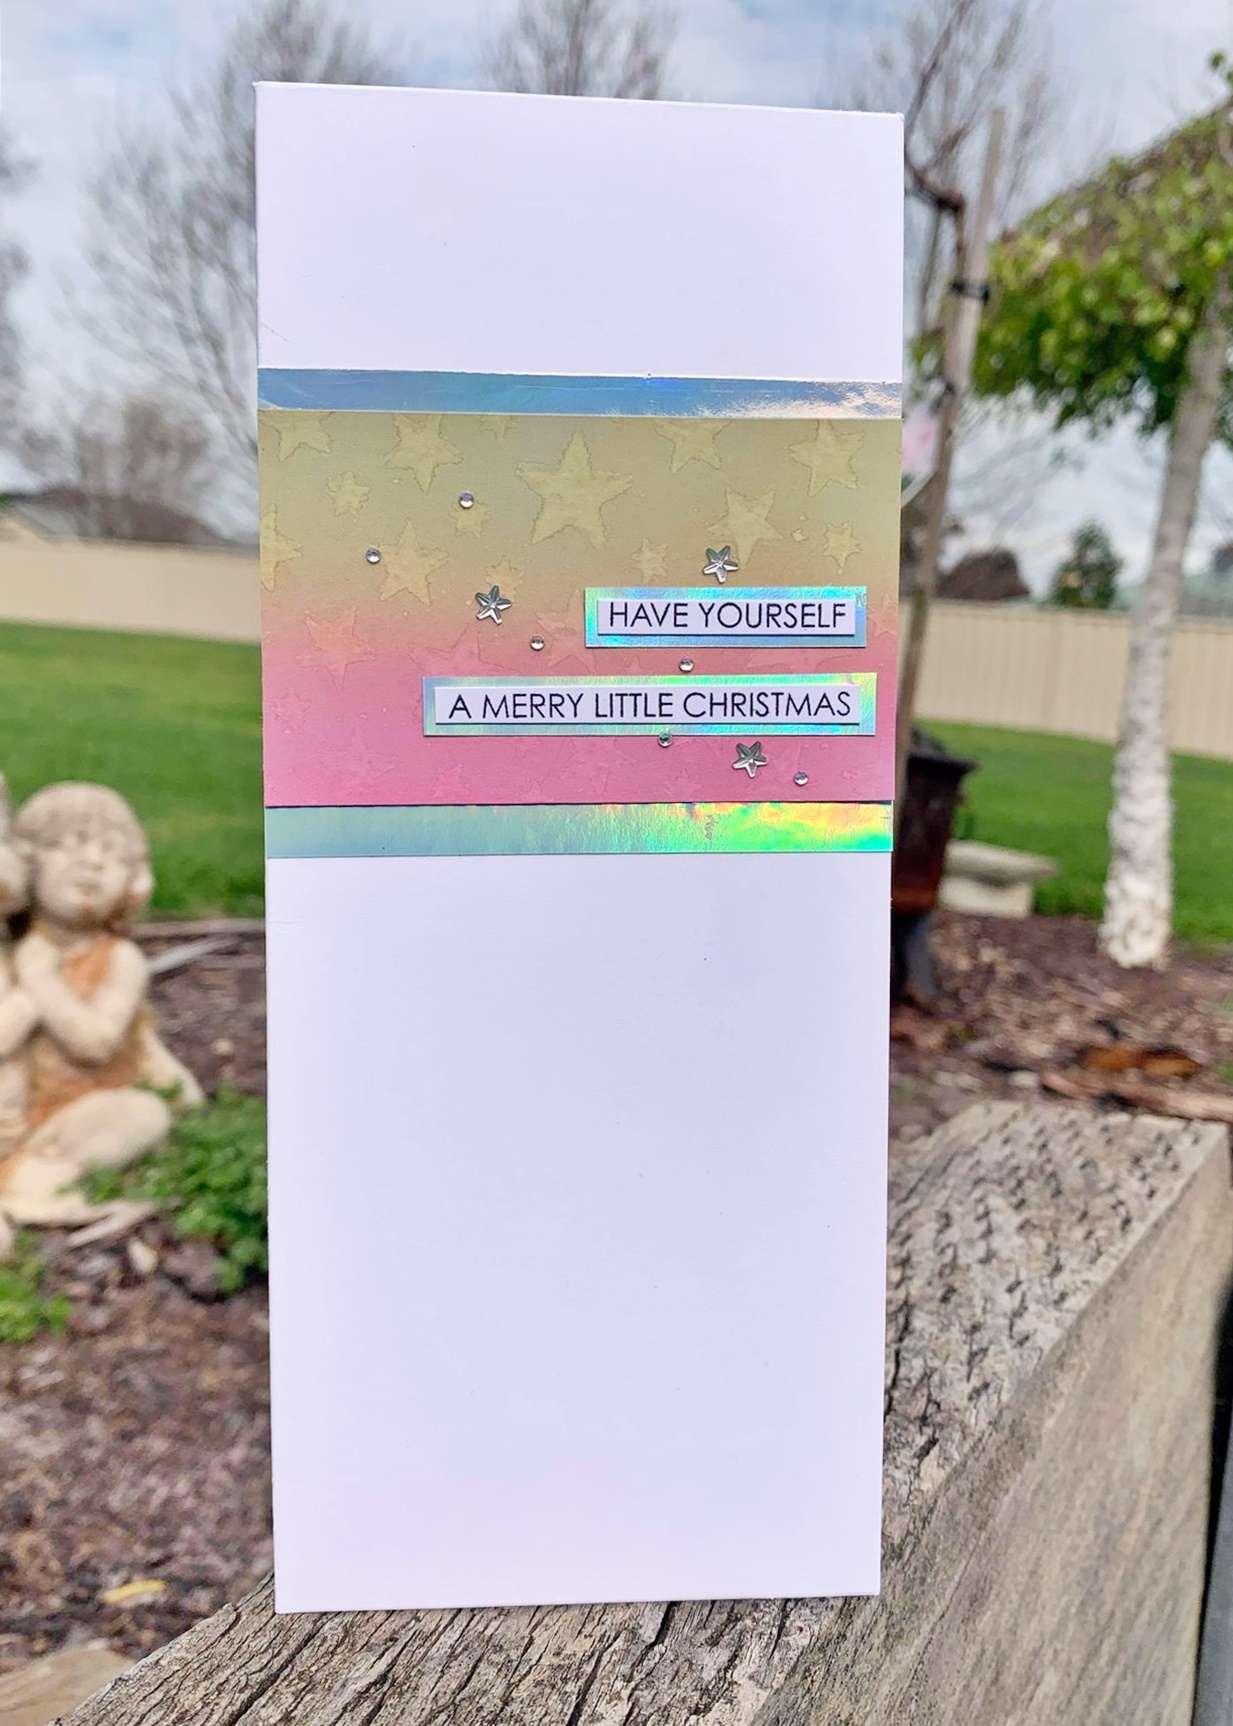
This is the beautiful card of Michelle's I chose this year:


I loved these elements especially:

- ink blending (Michelle's is seamless!)

- stars/sparkle

- the strip of intense colour across the card with all of that gorgeous white space to emphasise it.


Here's my spin on it:


Instead of stamping and embossing the stars, I chose to stamp using Darkroom Door's Starry Night Background stamp and use a mist of water instead of ink. Because I used Distress Oxide for the ink blending, when I stamped with water it dissolved the ink and I was able to lift it off with an absorbent paper towel.


I found a scrap of holographic cardstock and cut the words (Simon Says Stamp die) and the strips, then added some adhesive gems for extra sparkle.

And because I can never stop at just one when I'm inspired, here are another couple of cards:


Here they are all together:


Thanks for looking, and don't forget to pop over to Michelle's blog to see which card of mine she cased and to follow all of her wonderful crafty happenings.

Monday, 16 August 2021

Smile Stencil by Darkroom Door

 Another handy stencil from Darkroom Door's new release - the Medium Smile Stencil has all sorts of words to lift the spirits and put a smile on your face.

Here are a couple of cards I created with the stencil:


After creating a couple of watercolour backgrounds using Distress Oxide inks and a couple of Abstract stamps (02 and 06), I spread some Decofoil Transfer Gel through the stencil, then adhered some holographic foil to it with a laminating machine. The effect is spectacular!


I added a couple of embellishments to the card fronts using a butterfly from the Spread Your Wings Stamp Set, the Stars Stamp Set and the Simply Circles Stamp Set.


Thanks for stopping by today!


Monday, 9 August 2021

Darkroom Door's Journal Lines stencil

 Among Darkroom Door's latest release are a couple of stencils dedicated to journaling. I used the Journal Lines stencil to add some journaling to the front of a couple of cards. 


The backgrounds for both of these cards were created with Darkroom Door stencils and a gel plate; the small Wildflower Stencil for the card above, and the large Circles Stencil for the card below:


I stamped the birds on the orange circle card, then placed the Journal Lines stencil over the piece. I used a pencil to trace lines onto the background:


then wrote the words (happy birthday to you, over and over) using a permanent marker. I then erased the pencil lines:


I look forward to using this stencil in my art journal, in my planner, and even on envelopes!

Thanks for looking!


Friday, 6 August 2021

Large Honeycomb Stencil from Darkroom Door


 I had a play with Darkroom Door's new Honeycomb stencil and created a set of bee-themed cards:


You can see the stencil at the bottom right of the photo. Not only does it have the hexagon grid, it also has some solid hexagons, which helps create some interesting blank spaces within the pattern.

I mixed some Fossilized Amber Distress Ink reinker with some texture paste to make it yellow, and spread it in patches over the stencil onto a sheet of white card. When the texture paste dried, I cut the sheet up into pieces that would fit the front of a C6 card.


I stamped the Postcards Texture stamp with Distress Oxide ink, then used the sentiment and bees from the Buzzing Bees Stamp Set with some black ink. I then stitched a partial border with black thread before adhering to some coordinating patterned paper then onto a card:

This was a fun afternoon project - a set of cards to gift to someone I know who loves bees and the colour yellow.

Thanks for dropping in!

Wednesday, 4 August 2021

Viva la Flora Postcards from Darkroom Door

I was very excited to see a new product by Darkroom Door that features Rachel Greig's beautiful floral  photographic images. The new Darkroom Door Postcards contain 6 images per pack, and are printed on a nice thick card that will withstand some pretty punishing mixed media techniques.

I have used a postcard from the Viva la Flora pack as a card front, adding some machine stitching and some embossing:


The postcards made excellent sturdy bases, and the images are just wonderful. I went really bright with my colours which stand out brilliantly on the black and white:


The sentiments are from the Warm Wishes stamp set, and the backgrounds are Abstract 06 and the Daisy Delight Background stamp.


I'm even tempted to decorate the front of one of the postcards and send it through the mail! 

Thanks for looking - have an arty day!

Saturday, 31 October 2020

CASE me a Christmas Card Challenge

 The lovely Michelle Lupton has her annual challenge running again. 


This year she's hosting a bunch of cardmakers from around the globe, and our challenge is to case one of her creations from her blog.

Michelle's take on one of my cards can be found here. 

This is the beautiful card I chose. You'll find it here on Michelle's blog:


What I loved about it that made me want to case it:

  • the colour scheme is awesome
  • love the repetition of stripes of colour
  • love the subtle glitter effect on the word JOY

Here's what I came up with:


I used Waffle Flower's Nesting Circles dies (there are heaps of circles in this set!), and the words are from an old Simon Says Stamp die set.

While I had everything I needed out, why make just one card when you can make five? Here we go:


The Merry Christmas stamp is MFT, the ink is Catherine Pooler's Skylight and I used Altenew's Transluscent Pearl embossing powder over the top of it for just a touch of sparkle.


The card above uses a Paper Rose Studio stamp set together with a Pinkfresh Studio die.


^The leaf dies and the stamp are from Paper Rose Studio.

...and last but not least, the deer head and the word 'merry' are Paper Rose Studio, and the Christmas die is an old Simon Says Stamp.

Michelle - thank you for once again including me in your annual challenge! A showcase of cardmaking talent from around the world is just what the soul needs after the year we've all had. Check out all of the amazing artists on Michelle's blog:

https://handmade-by-michelle.blogspot.com/

I love Michelle's blog - it is one of the most inspiring places on the internet.

Thanks for dropping in everyone!

Monday, 27 April 2020

Darkroom Door Small Lavender Stencil

I adore stencils! They are so versatile and can be used with any number of media.

The new Small Lavender Stencil from Darkroom Door is no exception. Here's a card I made using a sponge and some Distress Oxide colours:


I used a round blending tool to apply Bundled Sage through the whole stencil, then used a Detail Blending Tool to apply first Shaded Lilac then Wilted Violet ink to the blooms.

In the background (before the stencilling) I stamped the Gazette Background stamp then the Coffee Stain Eclectic stamp using very pale Old Paper Distress Ink:


The sentiment comes from the Warm Wishes stamp set, and the frame is one of the Lots of Labels stamps.

Thanks for stopping by today!

Saturday, 25 April 2020

Darkroom Door Number Jumble Stencil

Hiya! Hope everyone is well in isolation.

I made some time to play with the new Number Jumble Stencil from Darkroom Door this week.

Here's what I made:


This is texture paste through the stencil, then various washes with watercolour made with Distress Ink. I stamped the French Script Texture stamp with Archival Violet ink, the sentiment is from the Thank You Sentiment Stamp and the frame is one of the  Lots of Labels stamps. Here's a close up of the background:


This next card has a very bright acrylic paint background, made by scraping a small amount of paint across the cardstock with a credit card. I coloured some texture paste with purple acrylic paint before applying it to the background through the stencil:


I finished the card off with the Happy Quote stamp and some neon orange stitching:


For this next card, I created a sponged background with Distress Oxide inks, then applied embossing paste through the Number Jumble stencil and sprinkled some Lime Tinsel embossing powder and heating to melt it. The quote on vellum is the A Thousand Miles Quote stamp.


 Lastly, I sponged some Iced Spruce Distress Oxide ink onto the centre of some cardstock, then sponged quite heavily with the same ink through the stencil:


The sentiment is one of the stamps from the Simply Circles stamp set, surrounded by a round label from the Lots of Labels stamp set.

Thanks for looking!


Wednesday, 22 April 2020

Darkroom Door Cascading Stars Stencil

I had a play with the new Cascading Stars Stencil from Darkroom Door  - love that it has the smaller stars as well as the big one at the bottom.

For this first card, I sponged some Dylusions paints onto a kraft card. To fill the background a little more, I lifted the stencil off, dried the paint, then put the stencil back onto the background in a different position to give me more stars. The word is from the Whimsical Words stamp set:


For this second card, I sponged some Distress Ink through the stencil over a watercolour background The stamps on the card are from the Home Sweet Home stamp set: 


 And for this last card, I sponged some Distress Oxide ink through the giant star (it spanned the width of the card!), and with the stencil in place, stamped the Starry Night Background stamp with the same ink. The rest of the stars came from the Stars stamp set, and the words from the Dream Big Sentiment stamp. A little silver paint spatter completes the card:


Here's a tip: spray the back of the stencil with a little low tack spray adhesive (you might be able to find some 'stencil spray'). This will stop it moving around while you are working through it.

Thanks for stopping by today!